http://www.hellobrio.com/blog/digitize-lettering-illustrator-image-trace

Learn about digital illustration, hand-drawn fonts, and how to run a creative business
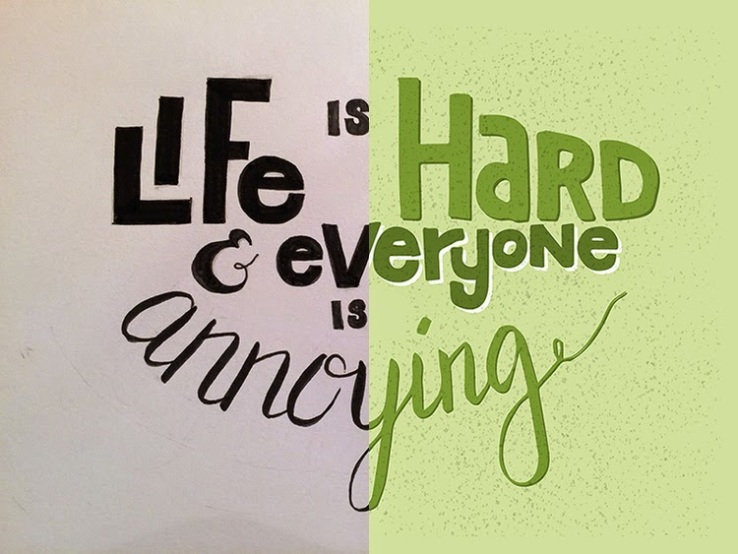
How to digitize your hand lettering using Illustrator’s Image Trace
The great thing about hand lettering is that it allows you to step away from your computer and completely unplug for a while. You can even go full-on Do Not Disturb and get lost in the practice of drawing for hours on end. It’s the perfect way to spend a weekend morning.
UPDATE 3/9/15: This post was originally published on November 1, 2014, but I’ve since updated it to include a helpful video tutorial. Check out the video at the bottom of this post, and please subscribe to my YouTube channel for more tutorials!
Once you hit a certain level of completion, it’s in your best interest to digitize your lettering pieces so that you can publish them on the web, add them to a portfolio, or use them in a print project.

And as cool and intricate as hand drawn effects can be, it is definitely fun to see what you can sit back and let the computer do for you. Think 3D effects, shadows, adding the perfect color palette, etc.
There are tons of ways to digitize your hand lettering art, all of which I plan to go over on this blog in time. (Want to learn all the ways? Make sure to sign up for my newsletter.)
In this post, I’ll teach you my favorite way of digitizing my doodles and lettering by using Image Trace in Illustrator. It’s a great way to capture the quirkiness that comes inherently with hand lettering while still allowing it to be scaled up to any size without losing image quality, since your result is vectorized art.
Tools Needed for Digitizing Your Lettering
To take your designs from paper to digital with this method, you need your work to be completely finished. Quick pencil sketches or really rough work just won’t cut it. Your work should be colored in, preferably in black, and be on a clean piece of paper.
To bring your art into your computer, you can either use a scanner (I use a Canon LIDE 110… affiliate link alert… I only recommend products I use and love, and this scanner is so affordable and does a good job) or you can use your camera phone .
Finally, Adobe Illustrator and Photoshop. While Photoshop isn’t necessarily needed, it is best for preparing your scan or photo so that it translates best in Illustrator. You will see more about this in a bit.
Step 1: Scan or Take a Photo of Your Work
Again, make sure your work is in a finished state, preferably black and white. If it isn’t B&W, you can work around it, but this method of using Image Trace works best with crisp, B&W line art.
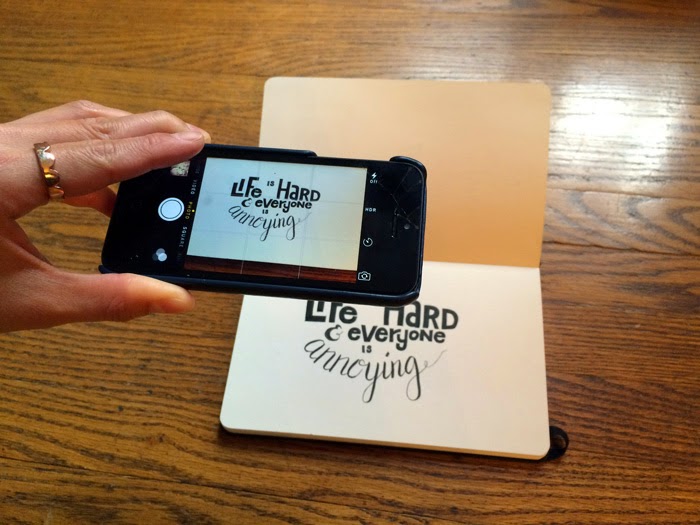
I’m so self-conscious about my hands in this photo!
If you’re taking a photo of your artwork, make sure to eliminate shadows or get them as even as possible, and take your photo square-on so you don’t have any weird perspective skewing.

Even though this photo is yellowed, the shadows are relatively even and there isn’t too much glare. It will be cleaned up in Photoshop in the next step.
Step 2: Open your Photo in Photoshop
Once you’ve loaded your photo onto your computer, open it up in Photoshop.
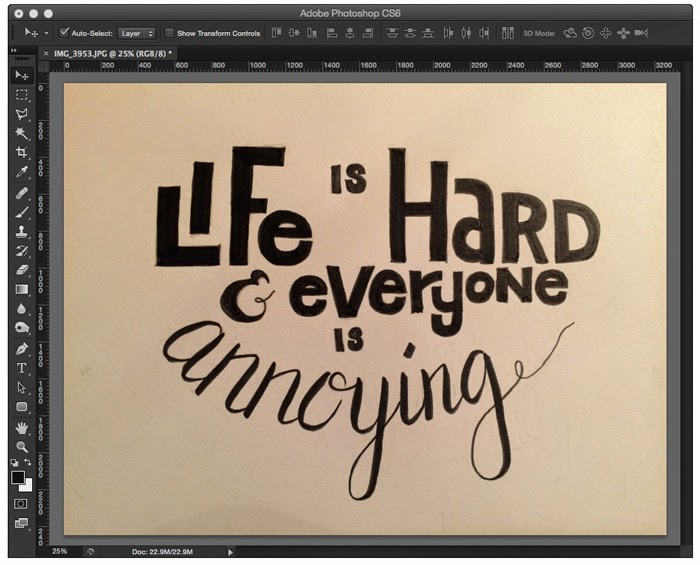
Here we are going to adjust the levels so the black art becomes blacker, and the page becomes white.
Go to Image → Adjustments → Levels… or type CMD+L on a Mac or CTRL+L on a PC. (I should note that desaturating your image — converting it to pure black and white in Photoshop — may make this process easier, especially if you’re working with a non B&W image. To desaturate, type CMD+Shift+U or CTRL+Shift+U or go to Image → Adjustments → Desaturate.)
Here’s the Levels dialog box.

From here, click the white eye dropper and click around on the white parts of the page until the background looks pure white without a lot of noise (the grain and weird shadowing that can start to pop out when you’re playing with levels).
Aim for the darkest white part of your drawing that still allows your artwork to be visible.

Then, use the black eye dropper to click on the lightest black on your drawing.

From there, you can adjust the left and right sliders until your artwork looks clean and high contrast.

Even after you’ve adjusted the levels in Photoshop, you may still have weird shadows especially around the edges of your page because of vignetting.
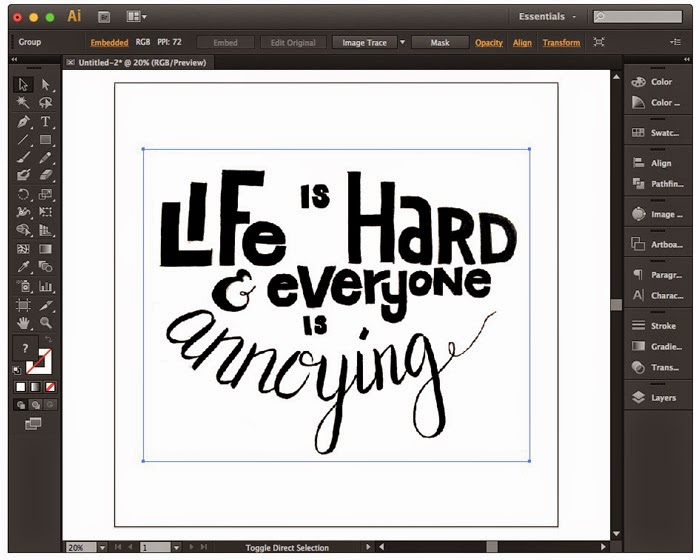
Step 3: Drop your Adjusted Artwork into Illustrator
Using the lasso tool (L) or the marquee tool (M), select the clean part of your artwork that you want to bring into Illustrator.
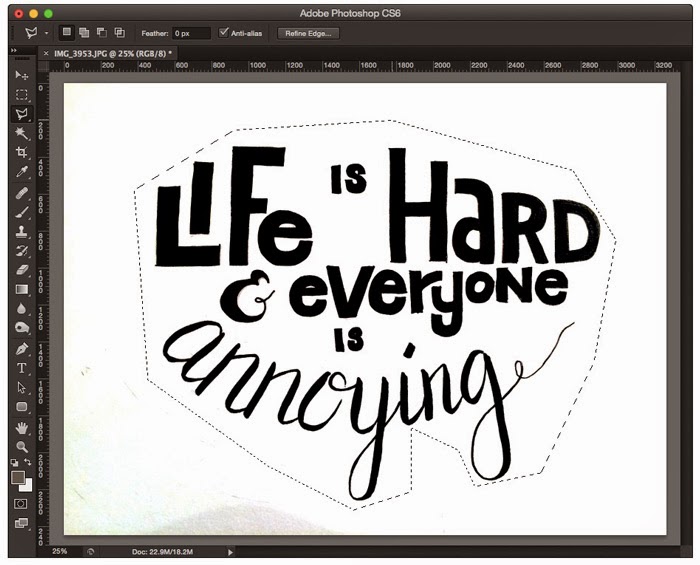
Copy (CMD+C) that selection in Photoshop, then open a new file in Illustrator, and paste it into that file. I made my Illustrator file 3000x3000px, but you can make it any size you want. Sizing in Illustrator doesn’t matter as much at this point because the end product will be a vector.
Step 4: Convert Your Artwork into Vector using Image Trace
Next, bring up your Image Trace panel in Illustrator (Window → Image Trace).
With the element selected, choose one of the Image Trace presets from the Preset dropdown. I recommend starting with Black and White Logo for these types of lettering projects.
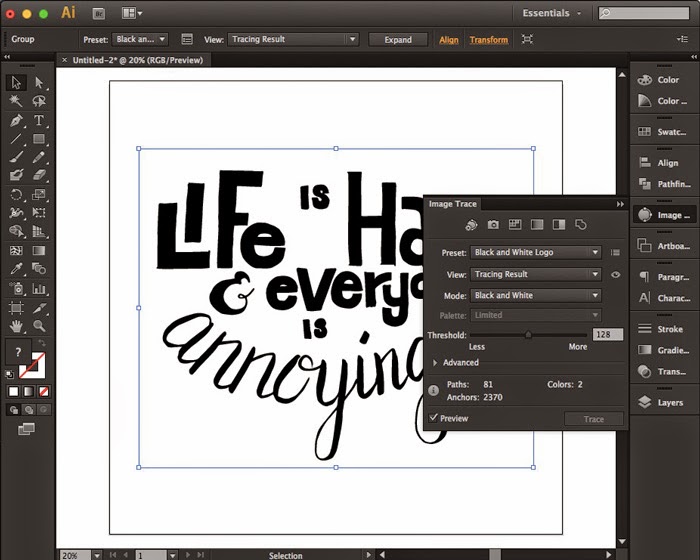
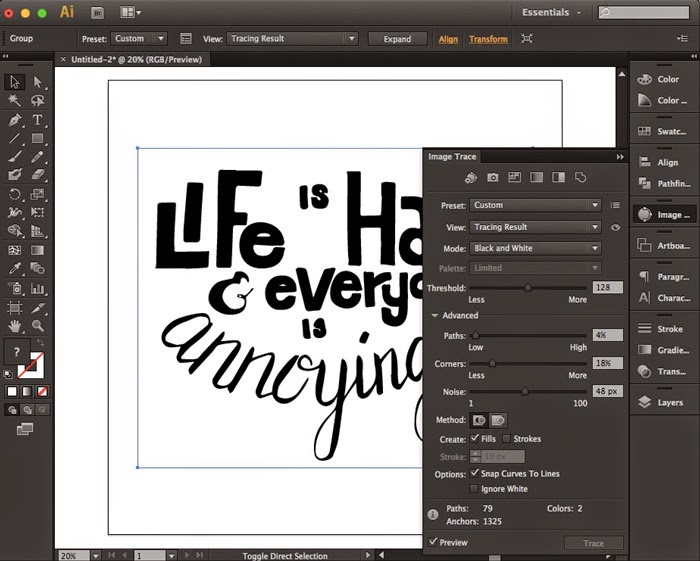
After you’ve chosen a preset you will see your artwork change in the background. We’re not done yet; here we can adjust the settings further. Click on the arrow next to Advanced so you can fine tune the Image Trace settings.
Play around with the sliders for Threshold, Paths, Corners and Noise. I usually like to have less corners so the letters look smoother, but you’re going to have to see what works best for your drawing.
Step 5: Expand and Ungroup Your Letters and Make Final Tweaks
Once the main parts of your drawing look good, click the Expand button at the top.

Then, ungroup the selection twice and you will have individual elements that you can move around the page and adjust as needed.
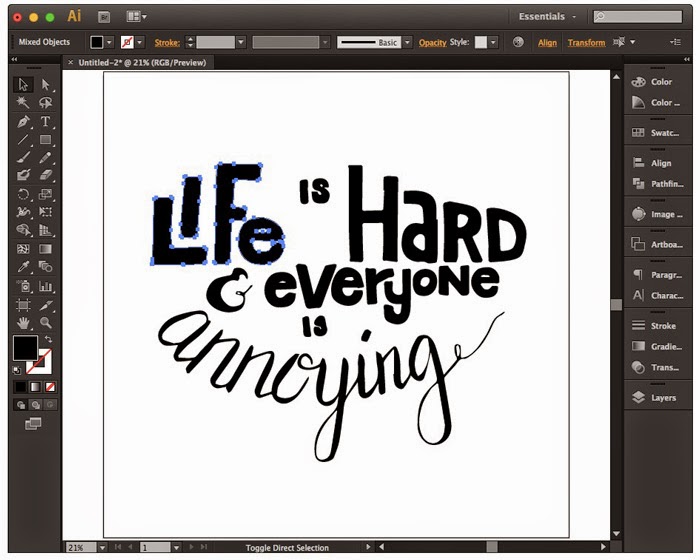
If you’re noticing that some words are coming out better than others, you may need to do a little doctoring by bringing your words in separately from Photoshop. For example, the “IS” and ampersand in my project are starting to become muddled because the size is so different from the rest of the project.
Delete the words or parts that don’t work for you, and re-paste them from your Photoshop drawing into your drawing in Illustrator and fine-tune the settings for those individual words or pieces.
Further adjust your artwork by using the pen tool and cleaning up your artwork. Once you’re done, you can change the colors and have some fun with texture and effects.

