Mr. / Mrs. Potato Head

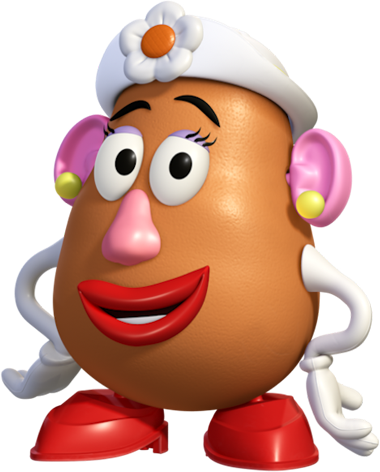
Directions for Potato head below:

Find the JPEG file Titled “Mr. Potato Head” in the folder:
Shared >Students >Fine Art >Pen Practice.
Drag this image to your home folder.

mr-potato-headMr. Potato Head 1.pngMrs. Potato Head 2.png

  1. Open a new Illustrator document.

  2. File> Place the Mr. Potato image on your Artboard.

  3. Name this layer reference image and lock it.

  4. Create a new layer name “Body” and trace the outline of the potato.

  5. Using the Eyedropper tool, fill this shape you made by clicking the potato color.

  6. Lock and hide this layer.

  7. Create a new layer named “Eye and Mustache layer”.

  8. Trace around the white eye shapes and black mustache shape.

  9. Use the Eyedropper tool to fill these shapes.

  10. Lock and hide this layer.

  11. Create a new layer named “Pupil and mustache highlights”.

  12. Continue working this way.

mr-potato

mr-potato-headmr-potato-head-1kolda

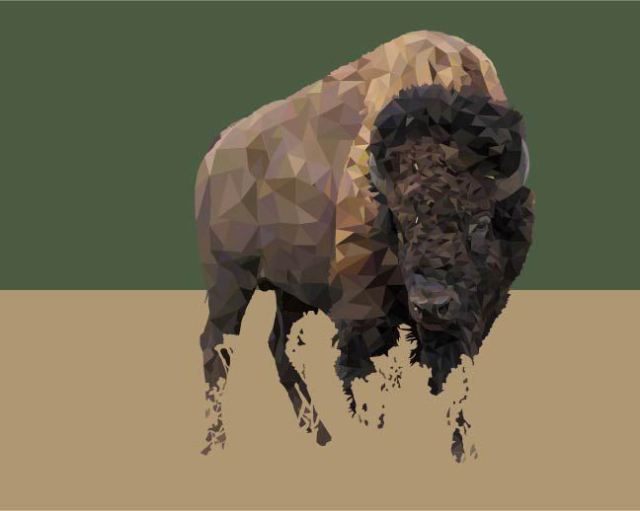
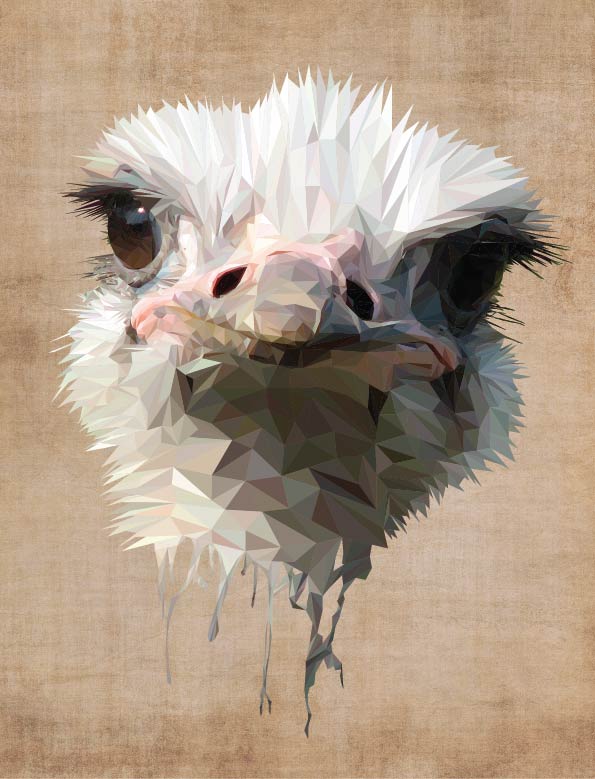
This example has too many anchor points used and not clean shapes:

potato-head-shape

Pen Tool Practice Continued

We are going to keep practicing our pen tool skills in Illustrator:

  1. Please Finish exercises 5.1, 5.2, and 5.3. Make sure you are following the steps on the blog post below: (Set fill to none, choose stroke color, Stroke weight at 3pt., Create new layer, etc.). Please show me when you are finished.


  2. When you are finished with the exercises, you may start another image of you choice in the pen tool practice folder: Shared > Students> Fine Art > PEN TOOL PRACTICE >IMAGES

When setting up a new document, complete the following steps:

  • Create new document.
  • File > Place the image of you choice
  • Resize holding down shift.
  • Resize Art Board using art board tool if needed.
  • Lock your photo layer.

Create new layer and start tracing lines as accurately as you can.


3. Directions for posting line practices to blog:

Open your line practice document.
Hide your reference layer
Resize your artboard if needed Capture.PNG
File > Export and save your file as a JPEG
Log in to your blog and post your these images to your blog.


Here are some of the images in the pen practice folder:

c5ed58e37c9ad7949f77fb15b5df71ca8ed4f1c2e0e515e69861dd9cb48e3f0852249dd6cac86a3f2be6b7d84e02156592939d0c9265a87dde8a14872180306cViking.jpgc9c0f5c574bd7b869d2fa3840f09a4cf

Pen Tool

Pen Tool Exercises

Today we will begin the Pen Tool exercises. You can find these in the folder: Shared > Students > Fine Art > Pen Tool Practice. We will work on exercises 5.1, 5.2, 5.3Remember: Complete each exercise 2-3 times (on separate layers) until you have mastered it. Tips: Press “P” to deselect, Edit > Undo if you made a mistake, and Ctrl + to zoom in and Ctrl – to zoom out.

Complete these steps when starting the exercises: 

  1. Set Fill to None.

fill none

2. Select a Stroke color

stroke color

3. Set your Stroke Weight to 3 pt.

3 pt stroke

4. Click the Layer icon on the bottom right panel  layers

5. Click Add New Layer icon create new layer

6. Name the new Layer “Practice 1 or 2”

practice 1

7. Click the Eye icon to hide “Work on this Layer” and make sure the top layer is highlighted before you start working.

hide

Please Remember: these are graded so save to your Home Folder > Graphic Design.

Happy Monday!

Today we will familiarize ourselves with the Adobe Illustrator workspace, tools, and shortcuts. One tool we will focusing on is the Pen Tool. Important terms today: pen tool, layers, anchor points, and convert anchor points.


Today as you’re working, I will come check your online portfolio.

Creating Your Online Portfolio

You will be creating your online portfolio and publishing your first blog post today.


1. Follow the directions to create your online portfolio: https://rooseveltgraphicarts.wordpress.com/your-blog/creating-your-blog/

After you are finished, login to the email you used and verify the email from wordpress to be able to publish posts to your online portfolio.


2. Create a new post and title it: Webquest. In your Webquest folder, find a your favorite images of your “Currently I’m . . .” and upload them. Then, find 1-3 of your favorite graphic artists images and explain why they’re your favorite. lastly, choose 1 image that best represents the element of line and describe the lines.

4. When you are finished with your post, you can spend the remainder of your time getting familiar with wordpress and even customizing font and layout of your site.


If you are having trouble finding examples of lines, ask Mrs. Carmany.


Examples:

Currently I’m . . .

81cscabivl-_sy355_.jpgpolaroid80s.jpgemblem-bic-logo.jpg


Graphic artists: I love the colors in this image and how simplistic the subjects are.CACTI 01

space.png


1-e1517839090140.jpg2f87381134e46ad2364df4cb1cad96dc5--daniel-craig-handlettering

There are repeated scribble-like lines surrounding the portrait on the magazine cover. The font also matches these lines. Some lines are black to stand out against the light background and some are white to stand out against the blue floor. 

walkingfarfromhomesingle_475x475.shkl_il_570xN.584896500_jjff

Line is a dominant element in this album cover design. The lines very in color and direction. The name of the band Iron and Wine is also composed of lines. 


Welcome Back!

Today we will start our Design Webquest. Save only images that you like or find interesting. You can find the directions under Project > 01 Design Webquest or you can click this link: https://rooseveltgraphicarts.wordpress.com/projects/graphic-design-webquest/

While searching for the various images, use the adjectives: cleaver, awesome, wonderful, beautiful, vintage, inspirational, retro, modern, whimsical, bold, interesting, etc.


When you are finished, start browsing different graphic artists to see the wide range of different artistic styles. You can Copy and Paste (Ctrl C, Ctrl V) the name of these graphic artists into google and save at least 10 images that are interesting and beautiful to you. Follow this link and browse through different projects. Right click and save your favorites as the artist’s name who created them:

https://rooseveltgraphicarts.wordpress.com/projects/graphic-artist-presentation/graphic-designer-presentation/

https://www.behance.net/galleries/Illustration?tracking_source=title

Mattis Kun:
25934a44153335.5808f3f7ce1e5.jpgab717a44153335.5808f3f7cd8df.jpg

Viscera Vicarious:
f06bb547434125.587eeded83362.png

Chloe Choa:
0cda7543068329.57e2387d10ff7.jpgc2b77c43068329.57e2387d0f8a0.jpgb5018943068329.57e2387d125a0.jpg

Ben the Illustrator:
cf5bdc47821747.58864b27d81ba.jpg20ecea47821747.58864b27d4d91.jpg

Marcelo Oliveira:78d0c716631376.5603ab4544033.png6445f716575694.5603aa5e63046.png

Ivan Filipov:

37278d5172881.560c58d336294.jpg627d785172881.57290691e9096.png

Welcome!

Welcome to Graphics!

Find a computer and Login.

Go to: http://www.rooseveltgraphicarts.wordpress.com

Here are some student examples of class projects we will be working on this year:

cropped-galaxy.jpgportrait.jpg

american-bison-art.jpgpoly-bear-sem.jpgleafsunset-1.jpgPicture4.jpgPicture5.jpgalt-j-poster.jpghakinson-geo.jpgthe-big-bang-theoryPicture3.jpgpokemon-minimal-movie-poster-finallotr posternik_done$RYMY8ANself-portrait-1Picture7.jpg$R0UP75H$RC2QF22Picture6.jpg$RRUVLJOemoji 3perks1.jpgimageoverimage.jpgproject4.jpglogicemoji.jpgall-layers.jpgbates-motel.jpgfalls5.jpg


Learning Goal: By the end of class today, you will know where to save your projects to, Capturehow to save images correctly, and get more of a sense of how design dominates the world we live in.

1. Open shortcuts folder from your desktop
2. Click your Home folder
3. Click New Folder
4. Type ‘Graphics’
5. Click Enter
6. Open the ‘Graphics’ Folder
7. Create another folder called: ‘Design Webquest’
8. Inside this folder, you will save images (right click > Save As) of the following:


“Currently I’m . . .”  Design Search 

Brainstorm and list some of your current interests.

For example: what you’re currently. . .eating, drinking, apps you’re using, reading, listening to, cheering on, watching, college goals, wearing, driving . . . or just list some of your favorite things. 

Then search logos, text, and/or brand designs and save these images to your Webquest folder in your Graphics folder.

These are my examples:

81+cscabiVL._SY355_Polaroid80s.jpgCoffea_Logo.pngs0946073_sc7.jpgEmblem-Bic-Logo.jpgmp,550x550,matte,ffffff,t.3u6 (1).jpg51uY2ceXuCL._SX331_BO1,204,203,200_Breadico_Logo.pngonbe_isolated_master_logo_square_1.jpgdownload.jpeg0002200000483_0_a1c1_0600.pngcornickharry-potter-3d-chrome-logo-emblem.1498513551.png97c2fe1202b079caa96c02afa2f9dd93.pngpatagonia-logo.jpg1024px-Caribou1.svg.pngdownload.pngnew-us-open-logo


Final Project Post

https://rooseveltgraphicarts.wordpress.com/your-blog/final-project-post/


05 Final Project Post

In Illustrator: 
Hide your reference image
File > Export your project as a JPEG

On your Blog:
Upload your reference image(s) you used on your final project and answer the following questions:

1. What did you choose as your subject?

2. What creative element(s) did you incorporate into your design?
Search “Geometric Graphic Design” or “Geometric Graphic” or “low-poly graphic”.  Save and upload a few images you find interesting. For example:

ag2.jpeg784da996e287fefe0884889371c3f8e6.jpg

3. Describe the process. How did you start? Were there any challenges along the way? How did you creatively solve them?

4. Describe the end result. What did you learn during this project? You may also write about the semester in general.

5. What was your favorite and least favorite project this semester? Why?